
Try it out
The demo instance gives you a fully functional JasperWho? environment — pre-loaded with report templates and example data. Everything you can do in a production setup you can do here, with one exception: print tasks do not reach a real printer.
![[SCREENSHOT: JasperWho? demo — the Report Configs overview with several pre-loaded report thumbnails visible.]](https://docs.jasper-who.kiwi-software.dev/uploads/images/gallery/2026-05/main-menu-2.png)
Access
The demo account has full access to all report data — Report Configs, History Records, Print Tasks, Connection Configs, Contexts, and Common Resources. It can also generate and use API tokens. User management is not available.
Guided Tour
Work through these steps in order for a complete first look at JasperWho?.
Step 1 — Browse the Report Configs
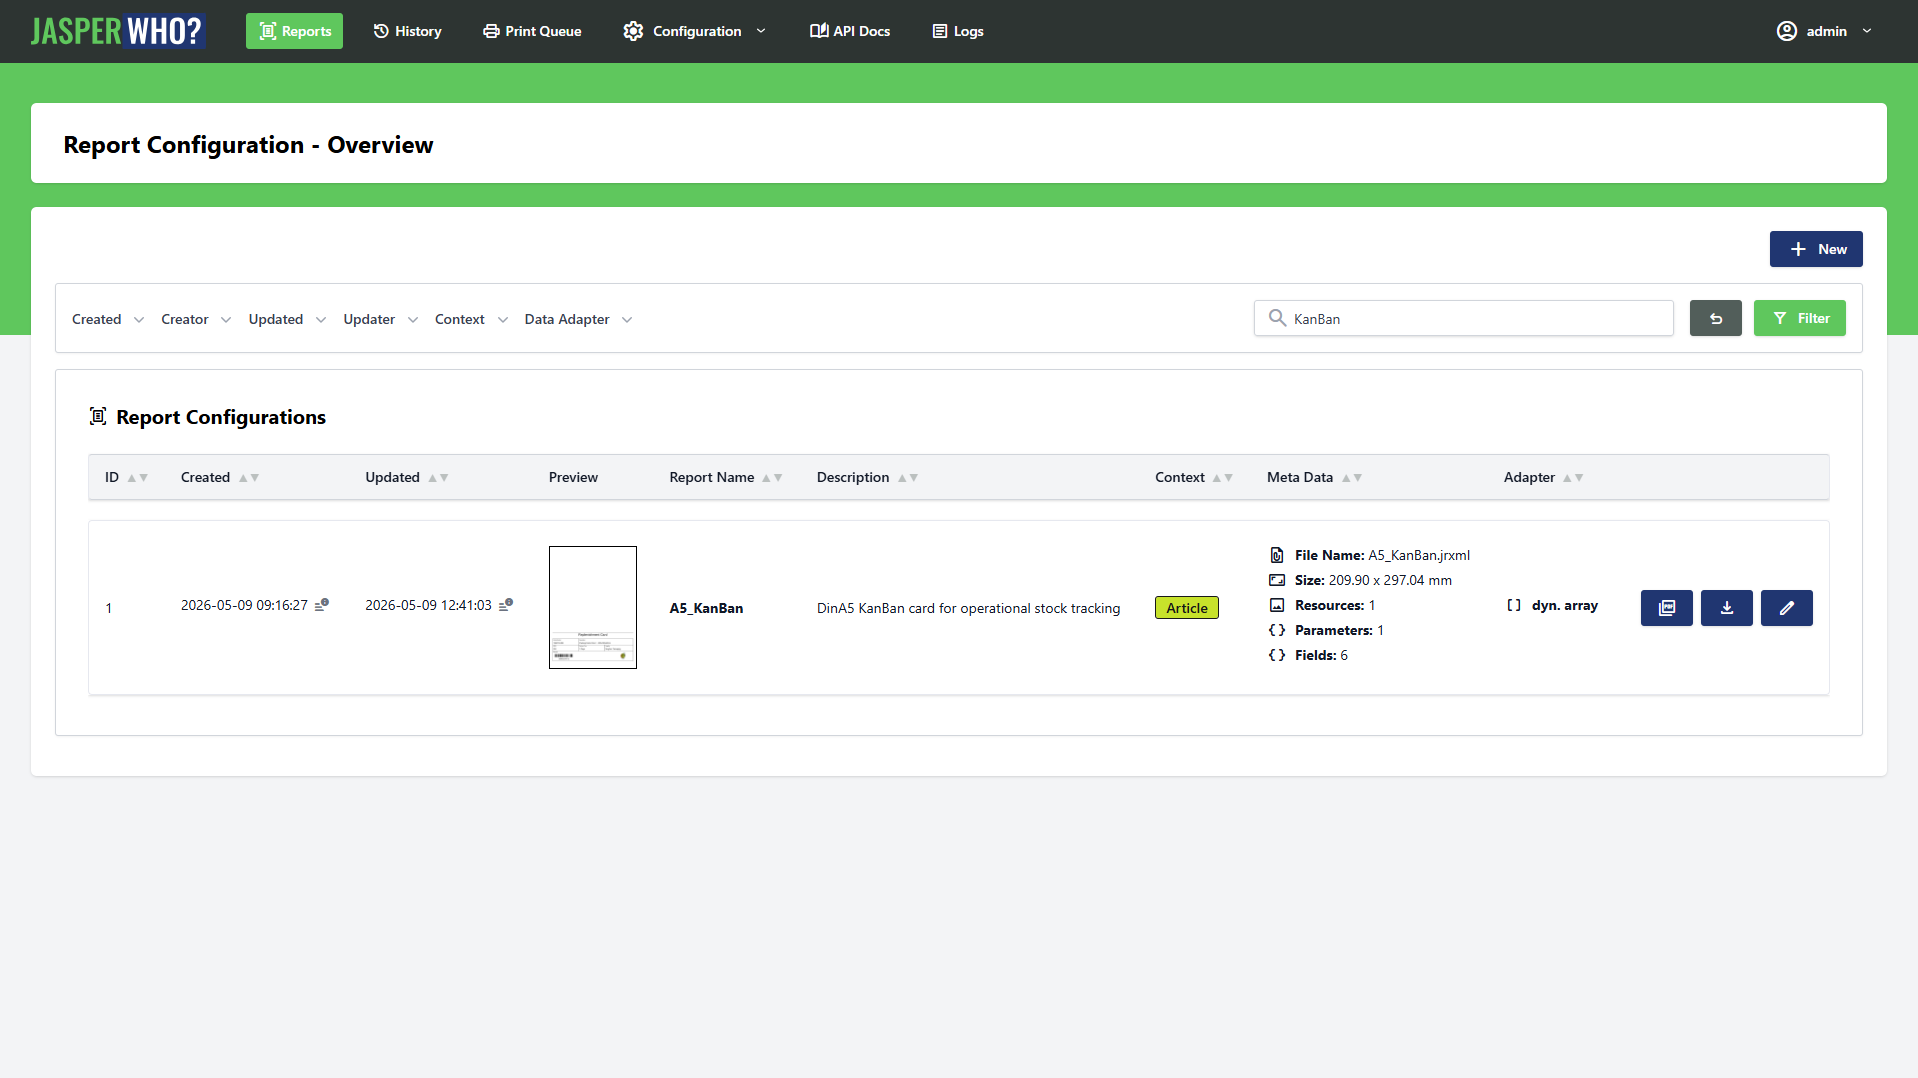
After logging in you land on the Report Configs list. This is the central workspace. Each card shows a thumbnail preview of the report and its context badge.
Use the search bar to filter by name, or use the dropdown filters to narrow by context or data adapter. Try typing part of a report name — the list updates instantly, no page reload.
Step 2 — Explore a Report Config
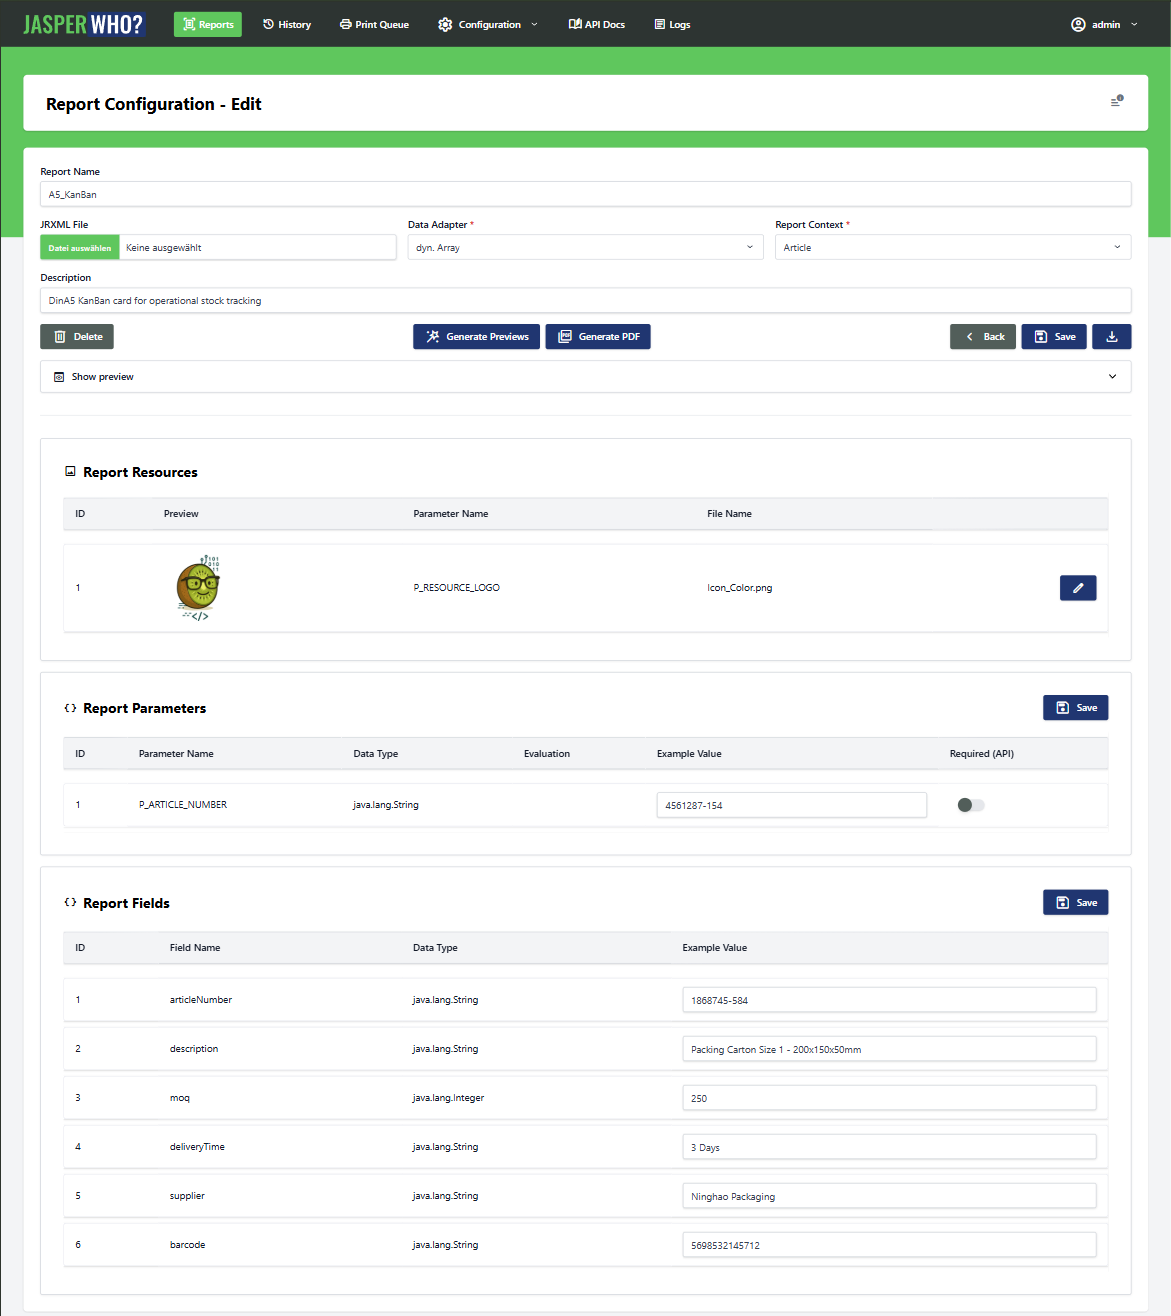
Click any report to open its detail view. Here you can inspect:
- Parameters — the inputs the report expects at render time, with their data types and example values
- Fields — the data columns that populate the report body
- Resources — image assets embedded in the template (logos, icons)
- Preview — the rendered thumbnail, generated from the stored example values
Scroll through the sections to get a feel for what JasperWho? extracts from a .jrxml file automatically on upload.
Step 3 — Render a Report from the Frontend
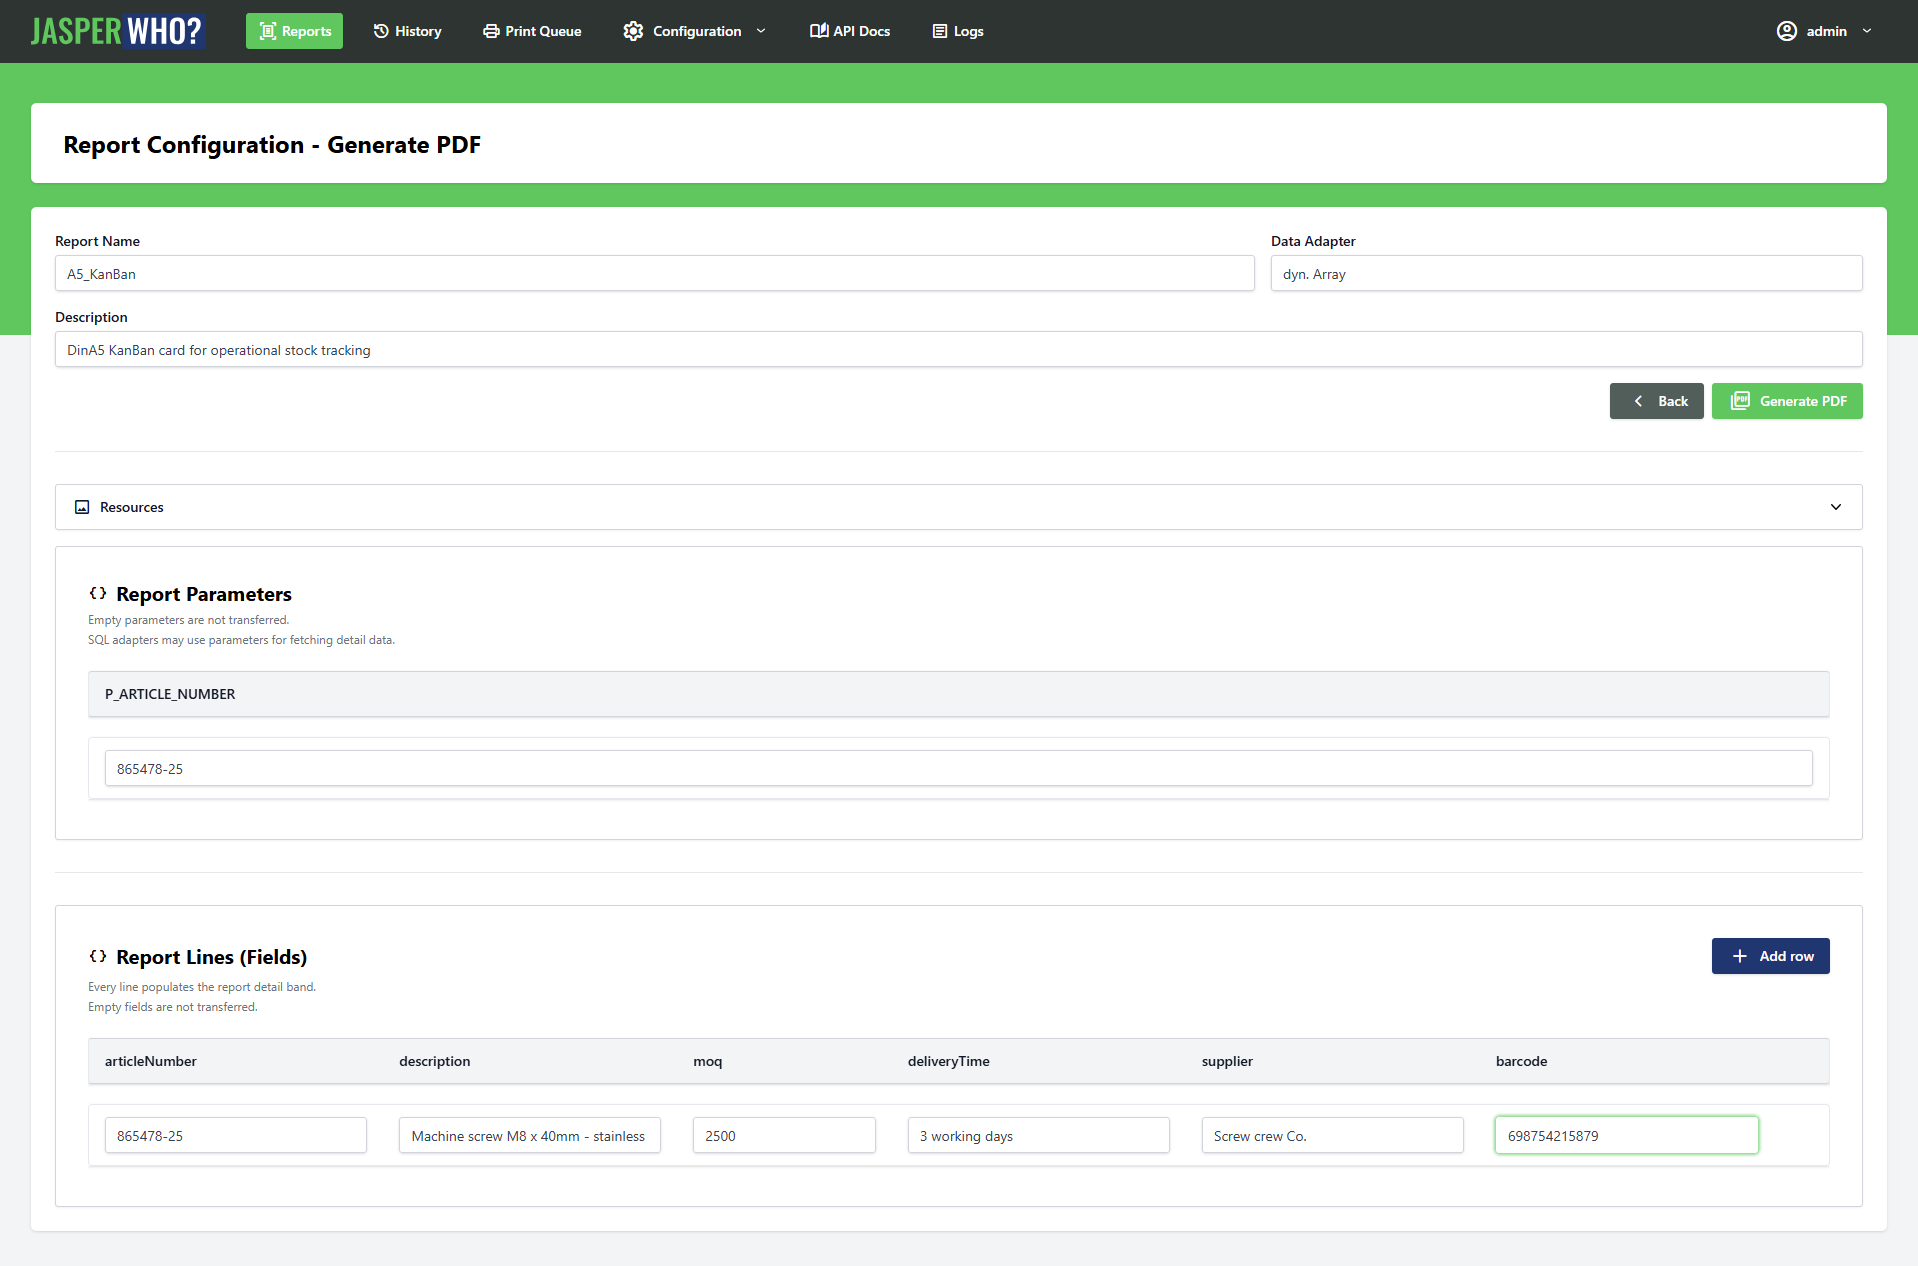
From within a Report Config, click the Generate PDF button. A dialog opens with pre-filled parameter values (taken from the example values stored on the config). You can edit any of them before rendering.
Select an output type — Base64 is fine for a quick look — and click Generate PDF. JasperWho? processes the request and shows the resulting PDF inline within seconds. No API call needed, no setup required.
Step 4 — Check the History Record
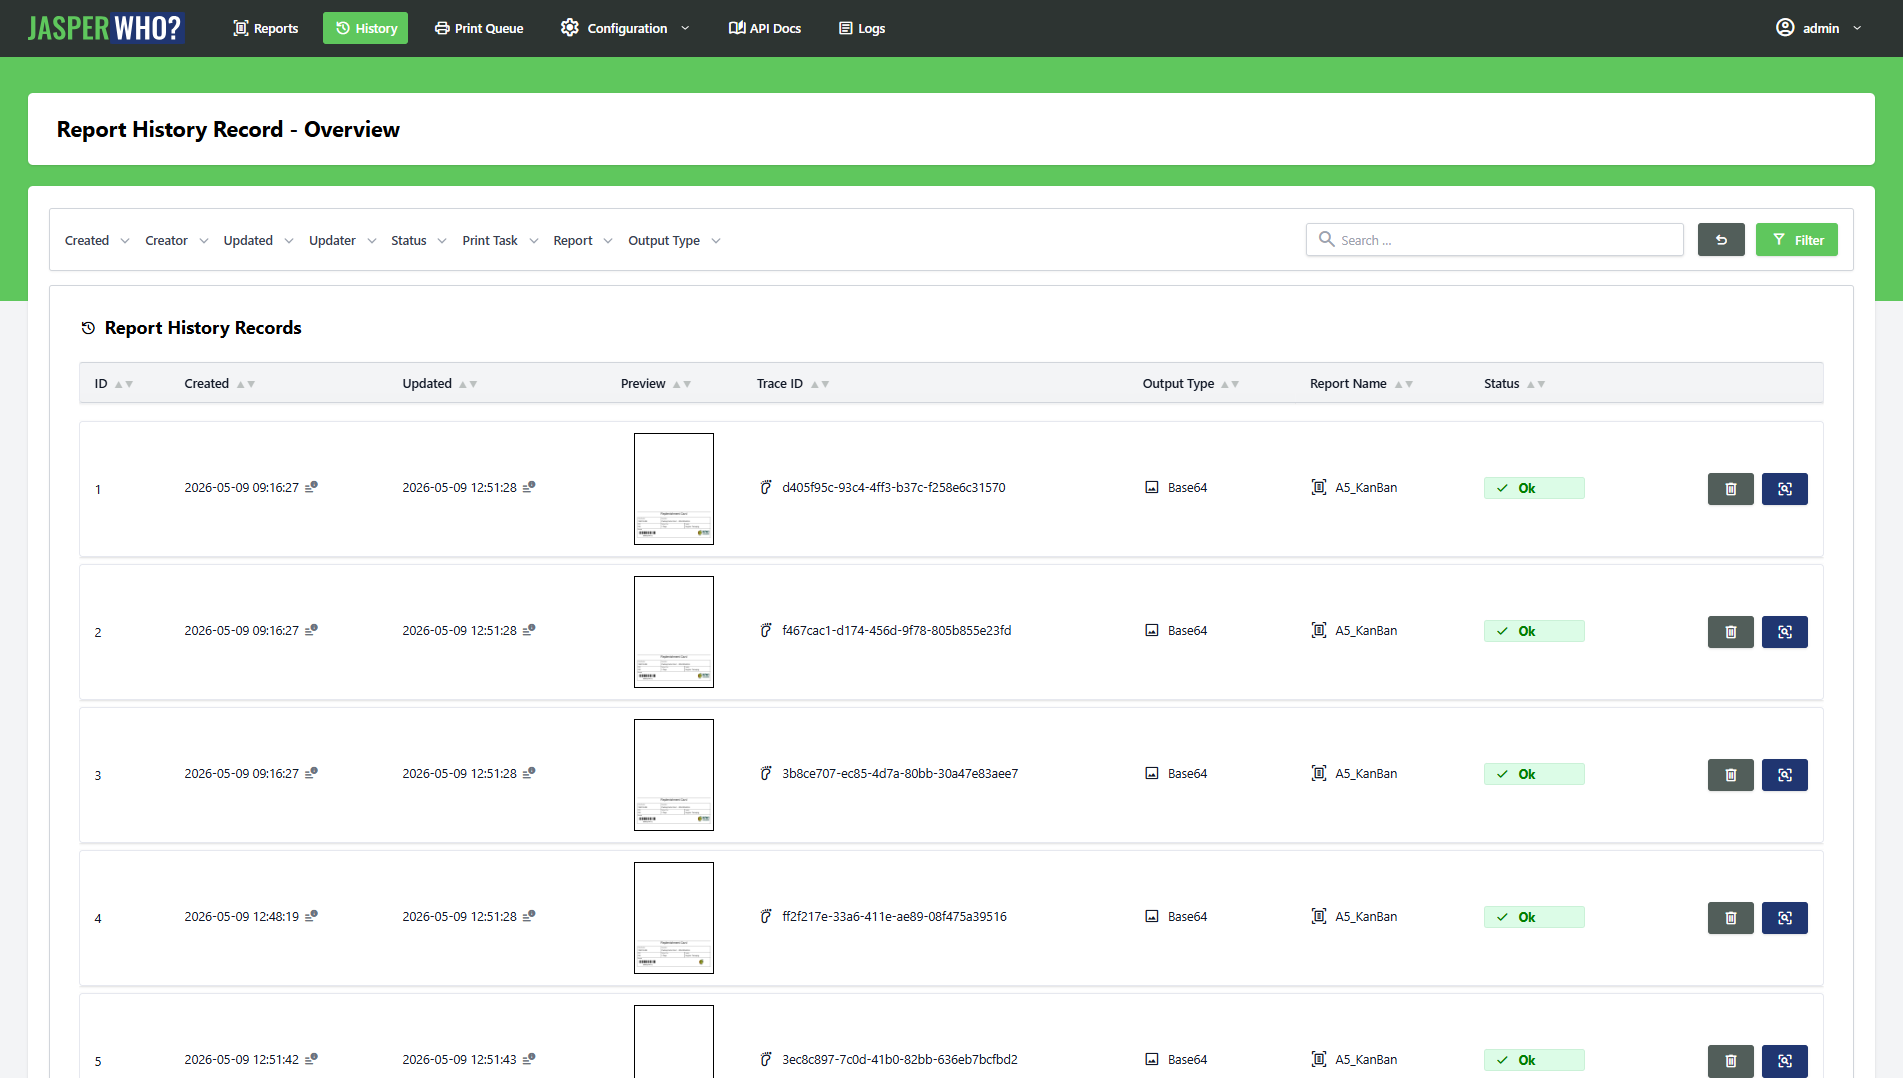
Navigate to Report History Records. Your render from Step 3 appears at the top of the list (if you left createHistoryRecord enabled in the dialog). Open it to see the full log: the exact request payload, the API response, the rendered PDF, and a thumbnail.
From here you can download the PDF directly or trigger a reprint — which creates a new Print Task.
Try It Yourself
Once you have completed the tour, these are good next things to explore on your own.
Upload Your Own Template
If you have a .jrxml file designed in Jaspersoft Studio, you can upload it directly to the demo. Go to Report Configs → Create, attach the file, and let JasperWho? analyse it. Within seconds, all parameters, fields, and resources are detected and listed automatically.
After upload, set any missing example values, upload resource files if needed, and click Generate Preview to produce a thumbnail. The report is then ready to render.
Call the API Directly
The demo account has API access enabled. To get a token, open the user menu in the top right corner and go to Account Settings → API Tokens — copy it immediately, it is only shown once.
With the token in hand, render any report with a single HTTP request:
curl -X POST \
  https://demo.jasper-who.kiwi-software.dev/api/v1/report-config/{reportName}/render \
  -H "Authorization: Bearer <your-token>" \
  -H "Content-Type: application/json" \
  -d '{
    "outputType": "base64",
    "useExampleValues": true,
    "createHistoryRecord": true
  }'
Replace {reportName} with the report_name of any config from the list (visible in the detail view). The useExampleValues flag tells JasperWho? to use the stored example values instead of requiring you to pass parameters and data manually — ideal for a first test.
The response contains the rendered PDF as a Base64 string and a trace ID you can look up in History Records.
Explore Print Tasks
When rendering via the frontend or API, enable the print task option and provide any printer name (e.g. demo-printer). JasperWho? creates a ReportPrintTask record with status pending. Since no print service is connected to the demo, the task stays pending — but you can inspect the full record and see how status tracking works. Completed print tasks are purged automatically after a configurable retention period.
Demo Limitations
| What | Behaviour in the demo |
|---|---|
| Print tasks | Created and traceable, but no real printer connected — tasks remain pending. Completed tasks are purged automatically. |
| Live SQL connections | Connection Configs can be created and tested, but no external databases are reachable from the demo environment. |
| User management | The demo account does not have admin rights — user accounts and permissions cannot be managed. |
| Data persistence | Uploaded templates, history records, and other data may be reset periodically. |
No comments to display
No comments to display